Home Depot Capacitor Guide: Troubleshooting & Replacement
2025.02.03
The capacitor, a small but crucial component in your home's air conditioning system, often goes unnoticed until it fails, leaving you sweltering. Luckily, Home Depot offers a range of replacement capacitors, empowering homeowners to tackle simple repairs themselves. This guide demystifies the capacitor, guiding you through diagnosis, selection, and replacement, helping you regain comfort and save money. From understanding basic capacitor function to finding the right one at your local Home Depot, we'll cover everything you need to know. Let's get started!
Understanding the Role of Capacitors in AC Systems
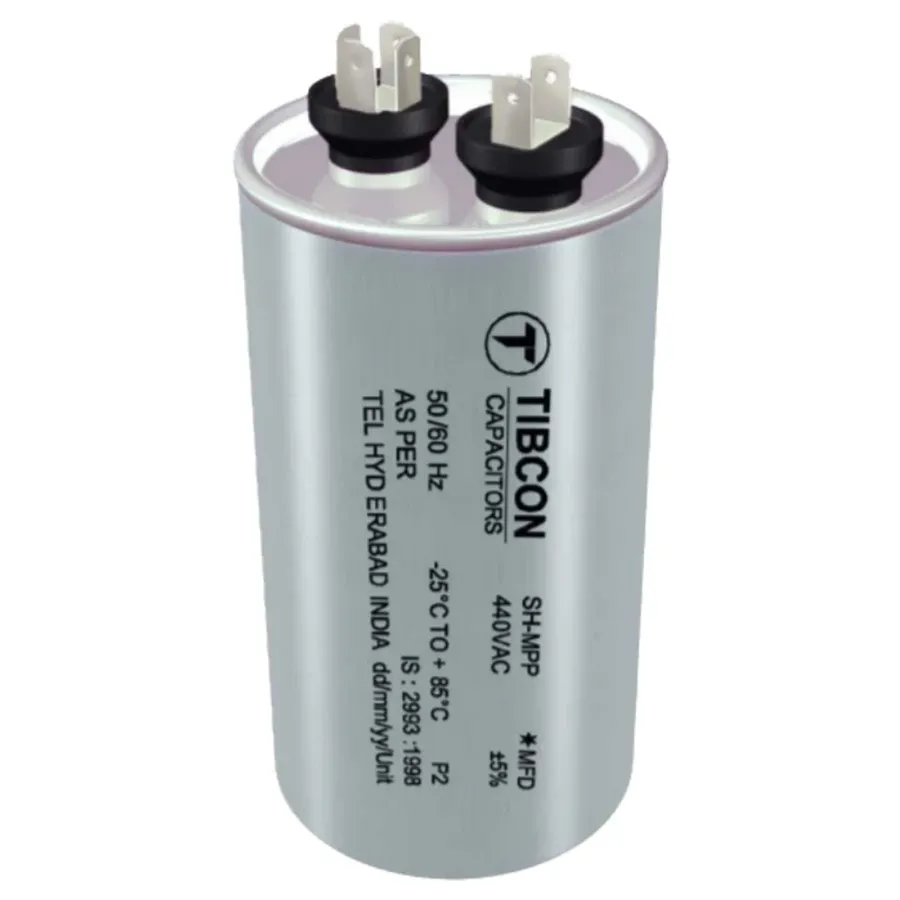
AC Capacitor
Capacitors are crucial components within air conditioning (AC) systems, acting as temporary energy storage devices. They are primarily responsible for providing the necessary electrical boost to start the compressor motor and fan motors, as well as ensuring efficient and smooth operation of these motors. Without a properly functioning capacitor, an AC unit may fail to start, or run inefficiently.
There are two primary types of capacitors used in AC systems: run capacitors and start capacitors. Run capacitors, typically connected to both the compressor and fan motor circuits, are designed for continuous operation and play a pivotal role in motor efficiency. Start capacitors, on the other hand, are used for only a brief period at startup and provide a high surge of power to initiate motor rotation. Their function is to provide a temporary boost of power that helps motors overcome inertia and reach running speed, and they do not operate continuously once the motor is running. These are not often used in residential units.
Feature
Run Capacitor
Start Capacitor
Primary Function
Continuous operation to improve motor efficiency
Provide a high surge of power for startup
Typical Use
Connected to compressor and fan motor circuits
Briefly used at motor startup
Operating Duration
Operates Continuously
Operates only at startup
Size
Generally Smaller
Generally Larger
Identifying a Faulty AC Capacitor: Common Symptoms
Faulty Capacitor
A malfunctioning AC capacitor can manifest in several ways, signaling the need for inspection and potential replacement. Recognizing these symptoms early can prevent further damage to your air conditioning system and ensure efficient operation. These symptoms often indicate the capacitor is no longer able to provide the necessary power for starting and running the compressor and fan motors.
Humming Noises A persistent humming sound emanating from the AC unit, particularly when attempting to start, often suggests the capacitor is struggling to initiate the motor. This humming indicates the motor isn't receiving the necessary electrical 'push' from the capacitor.
Slow Fan Startup If the fan blades of your outdoor condenser unit are slow to start or require a manual push, the capacitor might be failing to provide the initial energy surge needed. The fan may initially struggle to reach full speed, or seem to be working at a reduced power.
Inconsistent Cooling Sporadic cooling cycles or inadequate cooling output can be attributed to a failing capacitor. The AC may run for shorter periods, or may not cool the house sufficiently, because the capacitor is unable to maintain power to the motor, disrupting consistent operation.
AC Not Turning On In severe cases, a completely failed capacitor will prevent the AC from turning on at all. This could manifest as the AC failing to initiate or an immediate shut down after activation.
Visible Signs of Damage Visually inspecting the capacitor may reveal signs of damage such as a bulging case, leaking electrolyte, or burn marks. These physical damages clearly indicate capacitor failure and need immediate replacement.
When visually inspecting the capacitor, always prioritize safety. Before accessing the internal components of the AC unit, ensure power to the unit is completely shut off. The following steps should be taken to ensure safety during the visual inspection process.
Power Disconnection Turn off the AC unit's power supply at the circuit breaker and the outdoor disconnect switch to eliminate any electrical hazards.
Safety Assessment Before touching any part of the capacitor, check that the area is clear of obstructions or potential hazards. Use insulated gloves, and eye protection when possible.
Visual Inspection Carefully check the capacitor for physical damage. Note any signs of bulging, swelling, leaks or burn marks that clearly indicate failure. Handle the capacitor with care.
Safety First: Precautions Before Handling Capacitors
Safety Gloves
Handling AC capacitors requires strict adherence to safety protocols due to the risk of electrical shock from stored energy, even after the power is turned off. This section outlines the crucial steps for safely working with capacitors, emphasizing the potential dangers and necessary precautions to prevent injury or damage.
Turning Off Power Before starting any work, completely disconnect power to the AC unit. Locate the breaker for the AC unit in your electrical panel and turn it off. For additional safety, it is advisable to also disconnect the external disconnect switch, which is typically located near the outdoor AC unit.
Verify Power is OFF Even after turning off the breaker, always test using a non-contact voltage tester to ensure that no power is running to the AC unit. Confirm that no live voltage is present before proceeding with any further steps.
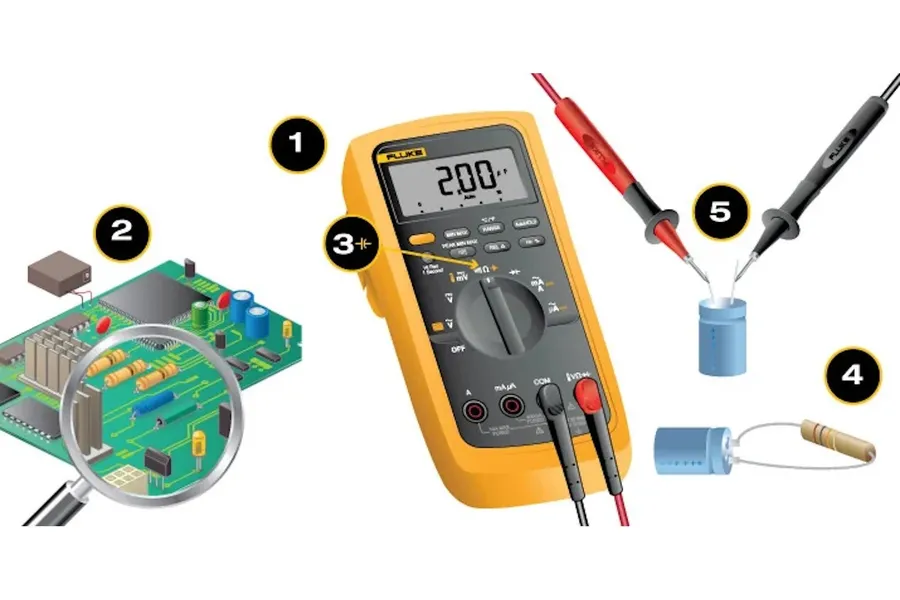
Discharging the Capacitor Capacitors can store a high-voltage charge even after the power is off. It's essential to discharge them using a multimeter to verify the voltage is at or near zero. You can use an insulated screwdriver to short the terminals (make sure the handle is insulated) or specialized tools for discharging. It's paramount to avoid physical contact during discharging.
Using a Multimeter Set your multimeter to measure DC voltage. Carefully connect the multimeter leads to the capacitor terminals (observe polarity). Once it is safe to do so, note the voltage reading. Allow sufficient time for the charge to dissipate, and continue to monitor until it reads close to zero volts. This process will discharge the capacitor.
Physical handling of the capacitor Even when fully discharged, avoid touching the metal terminals of the capacitor, use insulated tools during handling. Always treat the capacitor with care to avoid damaging it physically, which could cause a failure.
Safety Gear Wear appropriate safety gear, including insulated gloves, and safety glasses to prevent damage to skin or eyes during the process.
Finding the Correct Replacement Capacitor at Home Depot
Home Depot Capacitors
Locating the correct replacement capacitor at Home Depot requires careful attention to the specifications of your existing capacitor. These specifications ensure compatibility and proper function within your AC system. Crucially, understanding these parameters will streamline your search, whether online or in-store, at Home Depot. The key parameters include microfarads (µF), voltage rating, and the type of capacitor, such as a run capacitor or a dual run capacitor.
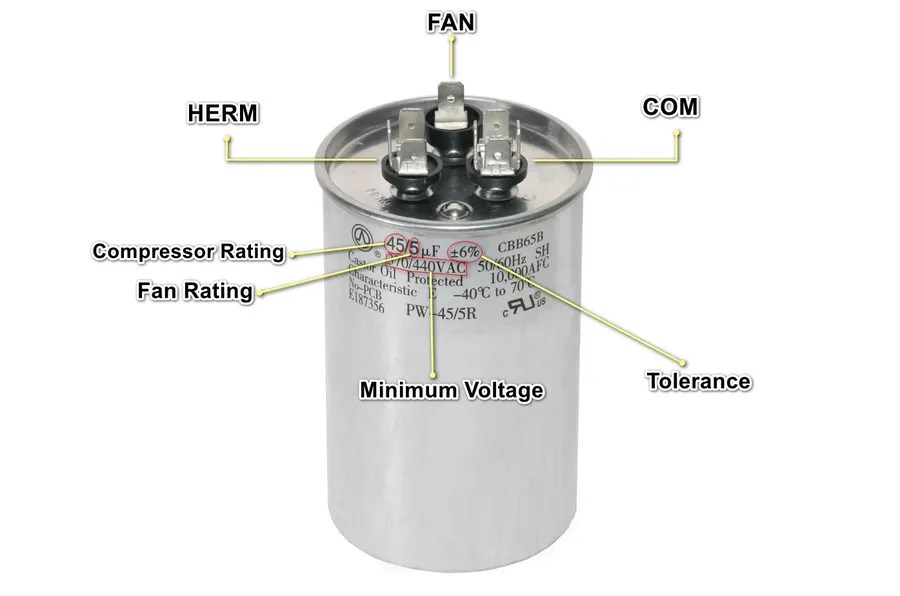
First, carefully examine the label on your old capacitor. The microfarad (µF) rating, typically shown as a number followed by "µF" or "MFD", indicates the capacitor's capacitance, which is critical for motor operation. The voltage rating, denoted by "VAC" or "V", must meet or exceed the original rating to ensure the capacitor can handle the system's electrical load safely. Finally, determine the type of capacitor. Run capacitors are designed for continuous operation, and the dual run capacitor which features terminals for the compressor fan and compressor motor, a common configuration in HVAC systems.
Specification
Description
Example
Microfarads (µF)
Capacitance, which determines the capacitor's ability to store charge.
45 µF
Voltage Rating (VAC)
The maximum voltage the capacitor can safely handle.
370 VAC
Type
Identifies the function of the capacitor within the system.
Run or Dual Run
Once you've recorded these specifications, you can use the Home Depot website or visit a physical store. On the website, enter the specifications (microfarads, voltage rating, capacitor type) into the search bar. You can filter by product type, brand, and price. Home Depot's website allows easy side-by-side comparison of different capacitors, which is helpful when trying to match the specifications of your existing capacitor. In-store, show the existing capacitor label to a knowledgeable employee who will be able to assist you in locating an exact replacement. Remember to always verify the capacitor you have chosen matches the original capacitor's specifications to maintain compatibility and ensure proper AC system operation.
Dual Run Capacitors are a common type of capacitor used in AC units. They are designed to power two motors simultaneously (typically the compressor motor and the fan motor) with one single device. They are identified by three terminals marked 'C' (Common), 'H' or 'HERM' (Hermetic - compressor), and 'F' (Fan). When a dual capacitor is required, it is essential to replace it with one of the exact same specification. The dual run capacitor is often specified by 2 values for the microfarads. For example a 45/5 microfarad dual run capacitor would supply 45 microfarads to the compressor and 5 microfarads to the fan motor.
Step-by-Step Guide: Replacing Your AC Capacitor
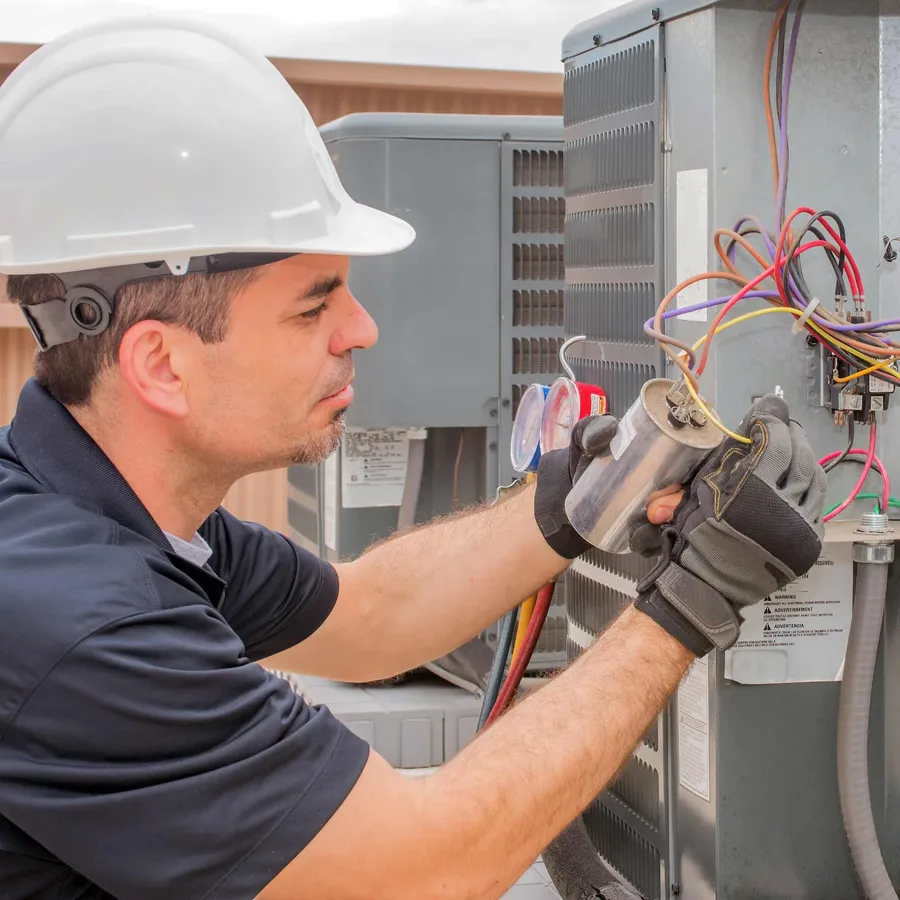
Replacing Capacitor
Replacing an AC capacitor is a manageable task for most homeowners, provided proper safety precautions are followed. This guide provides a detailed, step-by-step approach to ensure a successful replacement, emphasizing the importance of accurate wiring and secure connections.
Step 1: Power Disconnection Before commencing any work, it is crucial to completely disconnect power to the AC unit. Locate the circuit breaker for your AC unit in your home's electrical panel and switch it to the 'OFF' position. For additional safety, double check by testing the AC unit power terminals with a non-contact voltage tester to ensure that the system is completely de-energized.
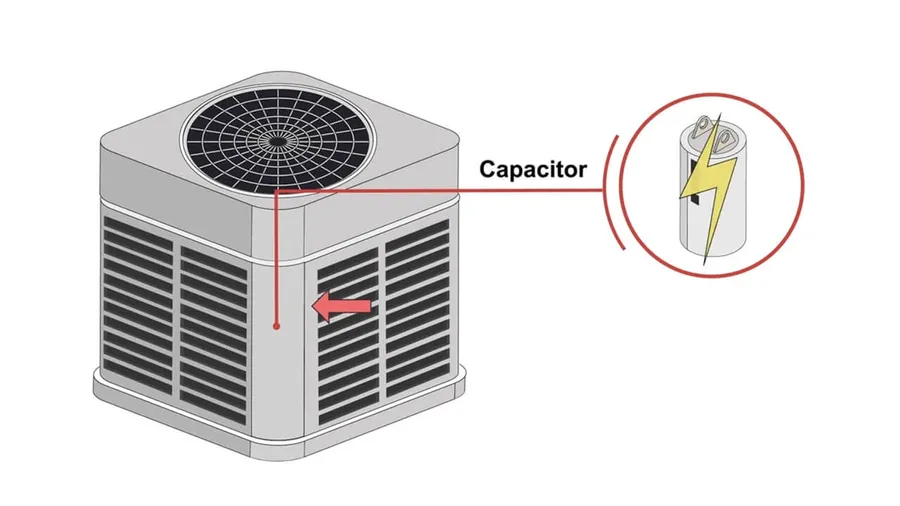
Step 2: Accessing the Capacitor Locate the capacitor compartment on your AC unit. It's usually behind a metal panel that is secured with screws. Using a screwdriver, carefully remove the screws and detach the panel to expose the capacitor. Note: Some units may require removing additional panels to get access to the capacitor; exercise patience and remember the order of panel removal and screw placement for reassembly.
Step 3: Capacitor Discharge Even after the power is off, the capacitor may still retain a dangerous electrical charge. Use a multimeter to verify the voltage across the capacitor terminals. If there is any charge, discharge the capacitor using an insulated screwdriver by carefully shorting the terminals. You must verify that there is no residual voltage to eliminate any risk of electrical shock before proceeding. This step cannot be skipped or taken for granted.
Step 4: Marking and Disconnecting Wires Before disconnecting any wires, take clear photos of the capacitor wiring setup, paying close attention to the color and terminal positions of each wire. Alternatively, use labels or a marker to carefully tag each wire with its corresponding terminal before disconnecting them one by one. Note: It is vital to maintain an accurate record of the wiring configuration. Incorrect wiring can lead to AC system malfunction or damage. When disconnecting, use pliers with insulated handles, and carefully pull each wire off its terminal.
Step 5: Removing the Old Capacitor After all the wires are disconnected, carefully remove the old capacitor. In some cases, it is secured by a clamp or bracket; if so, loosen or remove them. Lift the capacitor straight out.
Step 6: Installing the New Capacitor Place the new capacitor into the same position as the old one. Secure it with any clamps or brackets that were previously removed. Ensure the capacitor is seated properly. Verify that it is the same type, rating, and size as the old capacitor.
Step 7: Wiring the New Capacitor Referring to the photos or notes taken, connect each wire to the corresponding terminal on the new capacitor. Ensure that each connection is secure and tight. Double-check every wire connection.
Step 8: Securing the Compartment Replace the cover panel or panels over the capacitor compartment. Ensure all the screws are properly in place and securely tightened.
Step 9: Restoring Power and Testing Go back to the electrical panel and switch the AC circuit breaker back to the 'ON' position. Turn on the AC unit, observe and listen to its operation. The fan and compressor should engage smoothly, and the system should begin cooling effectively. Monitor the system for a few minutes to check for any unusual noises or performance issues. If everything appears to be operating normally, you have successfully replaced the AC capacitor.
A few final notes: Capacitors in AC units are not polarized, meaning they can be connected with either wire to either terminal. However, when replacing a dual run capacitor, you should make sure the wires go back to the correct terminals marked C, FAN, and HERM. Always double check the values of your original capacitor to ensure that you have the correct one as well.
Testing After Replacement: Ensuring Proper Function
Testing Capacitor
Following the capacitor replacement, rigorous testing is crucial to confirm the air conditioner's proper operation. This involves a systematic approach to verify the system's functionality, ensuring that the replacement has effectively resolved the issues and the AC unit is performing optimally. The key is to carefully observe the system's behavior after powering it back on.
Restoring Power After completing the capacitor replacement, carefully restore power to the AC unit at the breaker box. Ensure that the power switch at the unit, if applicable, is also in the 'ON' position. Proceed slowly and with caution, being prepared to shut off the power immediately if you observe any unusual behavior.
Initiating the AC Unit Turn on the thermostat and set it to cooling mode. Monitor the AC unit’s startup sequence. It should start smoothly without hesitation or abnormal sounds. Be attentive to any signs of slow fan startup, humming noises, or the unit failing to activate.
Performance Monitoring Once the AC is running, carefully assess the cooling performance. The system should produce cool air in a reasonable amount of time. Check the airflow from the vents, which should be consistent and adequate. Pay attention to the compressor’s operation; it should run smoothly without excessive vibration or noise.
Auditory Observation Listen closely for unusual sounds coming from the AC unit, such as hissing, grinding, or rattling. A properly functioning system should operate relatively quietly. Any strange noises could indicate persistent issues that require further investigation.
Identifying Persistent Issues If the AC unit fails to start, is producing inconsistent cooling, or continues to display the same symptoms as before the capacitor replacement, there may be an underlying problem beyond the capacitor. Consider checking the other components or consulting a qualified HVAC technician for further diagnosis. Record all the findings.
Frequently Asked Questions About AC Capacitors and Home Depot
This section addresses common questions regarding AC capacitors, their function, replacement, and where to purchase them, specifically focusing on options available at Home Depot. We aim to provide clear, concise answers to help you troubleshoot and maintain your AC system effectively.
Can I run my AC without a capacitor? No, you generally cannot run an AC unit without a functioning capacitor. The capacitor provides the necessary electrical boost to start the motor. Without it, the motor may hum but won't start, leading to potential damage. It's essential to replace a faulty capacitor for proper AC operation.
Is it okay to run an AC with a bad capacitor? No, it's not recommended to run an AC with a bad capacitor. A failing capacitor can cause the motor to overheat, leading to potential damage and reduced lifespan. Running an AC with a bad capacitor will often result in inefficient cooling and higher energy bills and can ultimately damage the compressor. Replace a failing capacitor promptly to prevent further issues.
Can I replace a 30/5 capacitor with a 45/5 capacitor? While both are dual-run capacitors, the microfarad (µF) rating must be very close to that specified for your unit. Replacing a 30/5 with a 45/5 is not recommended. The '30' relates to the compressor and the '5' to the fan. The capacitor provides the appropriate starting and running power. Using the wrong capacitor can damage the compressor motor or reduce efficiency. Always replace the capacitor with one of the same specifications unless a certified HVAC technician advises otherwise.
What are the signs of a bad AC capacitor? Common signs of a failing AC capacitor include a humming noise from the AC unit without the fan starting, a slow-starting fan motor, inconsistent cooling, or the AC unit not turning on at all. You might also observe physical signs of damage on the capacitor itself, such as bulging or leaking. If you notice these symptoms, it’s highly likely that your capacitor needs replacing.
Does Home Depot sell AC capacitors? Yes, Home Depot sells a variety of AC capacitors both in-store and online. They typically stock common capacitor sizes and types, including dual run capacitors. You can use the Home Depot website or visit a local store to find the capacitor that matches the specifications of your current one. Make sure to verify the microfarad (µF) and voltage ratings to ensure compatibility.
What is a dual run capacitor and when is it needed? A dual run capacitor is a type of capacitor used in AC units that serves two motors: the compressor motor and the fan motor. It has three terminals. It provides the necessary electrical charge to start and run both motors. Dual run capacitors are needed in AC systems that utilize both a compressor motor and a fan motor. It reduces the number of components needed by combining the function of two single capacitors into one unit, while providing a consistent charge for both. If you’re replacing a single capacitor with three terminals it means you need a dual run capacitor.
How do I find the correct replacement capacitor at Home Depot? To find the correct replacement capacitor, start by identifying the specifications on your old capacitor. The microfarad (µF) rating and voltage rating are critical values. Search the Home Depot website using the identified microfarad (µF) and voltage, or bring the old capacitor to the store and consult with a sales associate for proper guidance. Always double-check the ratings of the new capacitor against those of the old to confirm compatibility before purchase.
Capacitor Maintenance Tips & Long-Term Care
While AC capacitors are robust components, regular maintenance and care can significantly extend their lifespan and prevent unexpected failures. This section outlines key practices to ensure your capacitor operates optimally and avoid premature replacement, saving you time and money. A proactive approach will help maintain your AC system's efficiency and reliability.
Regular Visual Inspections Conduct periodic visual checks of the capacitor, looking for any signs of physical damage like bulging, swelling, or leaking. Early detection can prevent further damage to your AC unit. Pay special attention to the terminal connections for any signs of corrosion or looseness.
Cleanliness is Key Ensure the area around the capacitor and the AC unit itself is free from debris, dirt, and obstructions. Overheating can occur from poor ventilation, which shortens the lifespan of the capacitor. Keep the unit clear of any plants or other material that can obstruct airflow.
Monitor AC Performance Pay attention to your AC's operational patterns. Unusual noises, slow fan startup, or inconsistent cooling can indicate that the capacitor may be nearing failure and should be checked. Address any issues promptly to avoid more extensive damage.
Professional Inspection Schedule professional AC check-ups at least annually. HVAC technicians have specialized tools and the expertise to thoroughly inspect the capacitor and the entire system, ensuring they are functioning within optimal specifications. Regular professional inspections can catch hidden issues and help optimize performance.
Understanding Expected Lifespan The typical lifespan of an AC capacitor is around 10-20 years, though this can vary based on operating conditions and environmental factors. Factors such as extreme temperatures and voltage fluctuations can shorten a capacitor's life. Being aware of this helps in planning for timely maintenance or replacement.
By consistently following these maintenance tips, you can optimize your AC system's performance and lifespan, prevent unexpected breakdowns, and avoid costly repairs.
Replacing a capacitor in your AC system might seem daunting, but it is often a manageable task for the average homeowner armed with the right knowledge and tools from Home Depot. By understanding the function of your home depot capacitor, recognizing the signs of failure, and following the safety steps, you can restore your AC to its peak performance and comfort while saving on potentially expensive service calls. This guide is your resource for confidently addressing capacitor issues, ultimately keeping your home cool and comfortable all season long. Remember, while this guide provides comprehensive information, consulting a professional is always the best option if you're unsure or feel uncomfortable with the process.